> ## Documentation Index
> Fetch the complete documentation index at: https://docs.solidyne.ar/llms.txt
> Use this file to discover all available pages before exploring further.
# UDX USB Adapter
> Interface for connecting computers to AES3 inputs and outputs
This adapter allows connecting a computer via USB to one AES3 input and one AES3 output.
## Connection
Next diagram shows a connection to UX24.
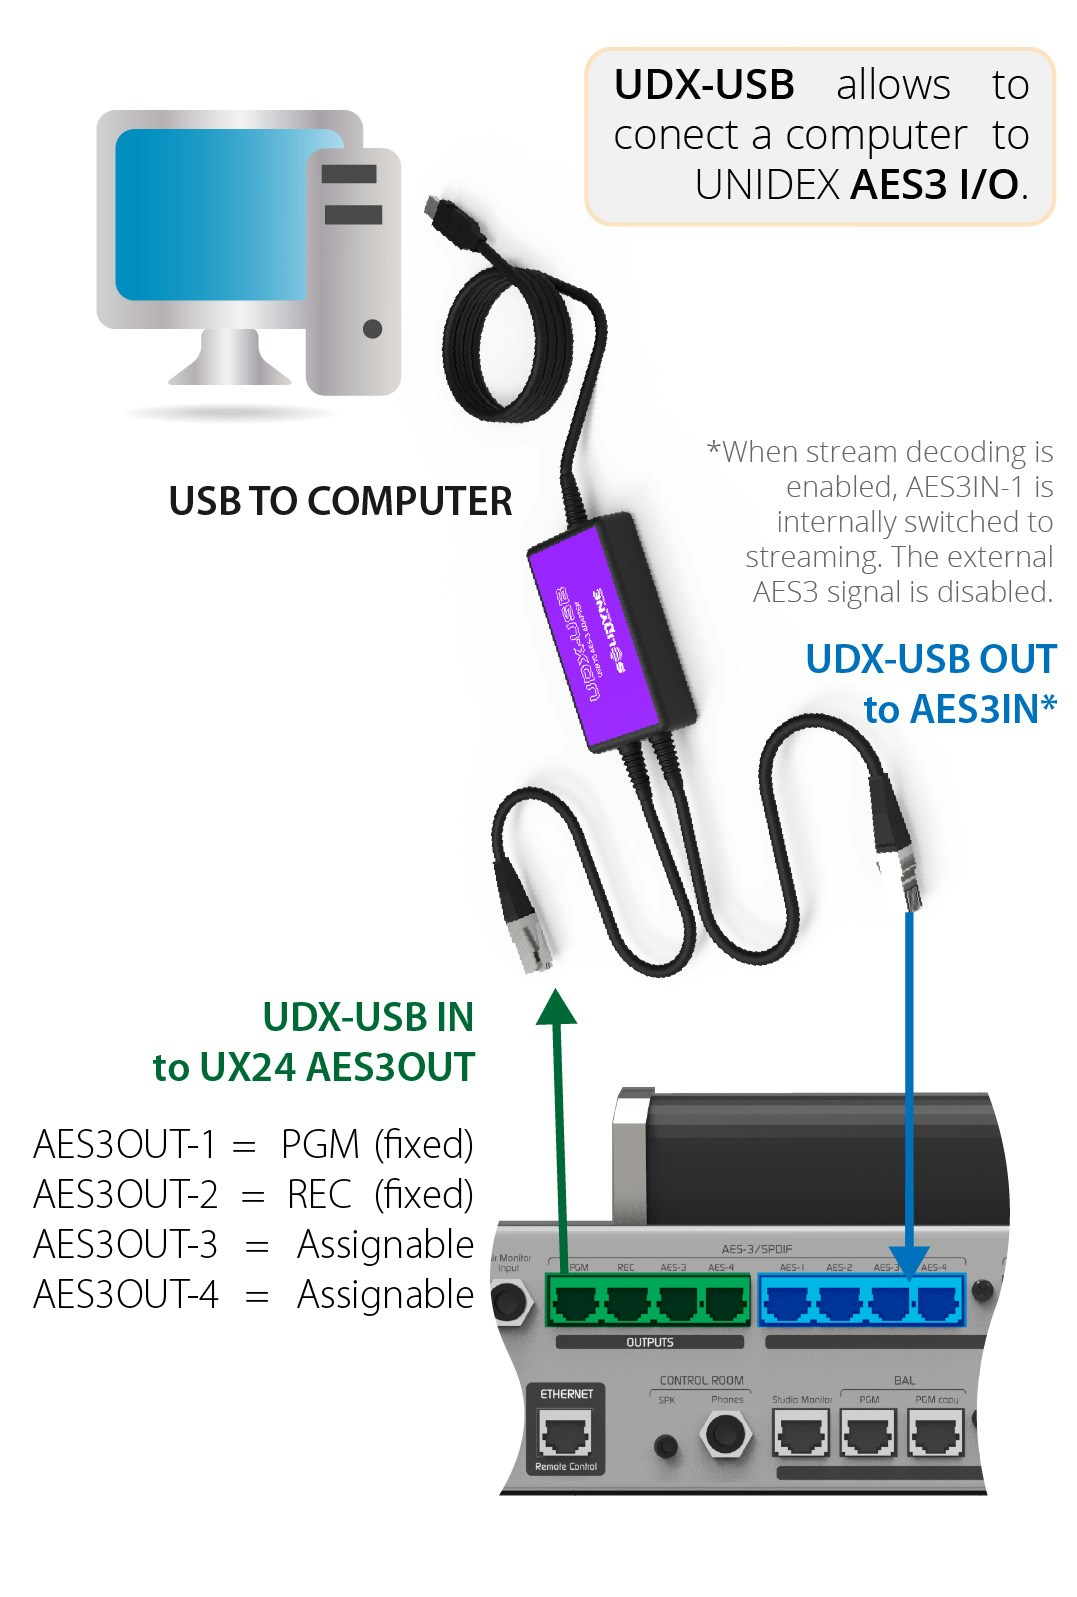 * AES3-1 input is not available if streaming playback service is enabled.
* On UX24 models, AES3 outputs 1 and 2 deliver PGM and REC signals respectively, while 3 and 4 are assignable. UX18 has two AES3 outputs, both assignable.
* Computer installation is automatic. Windows recognizes and enables UDX USB as a standard USB audio device for stereo playback and recording.
## AES3 Input Configuration
The layout and appearance of controls shown below may vary. This does not affect the configuration procedure.
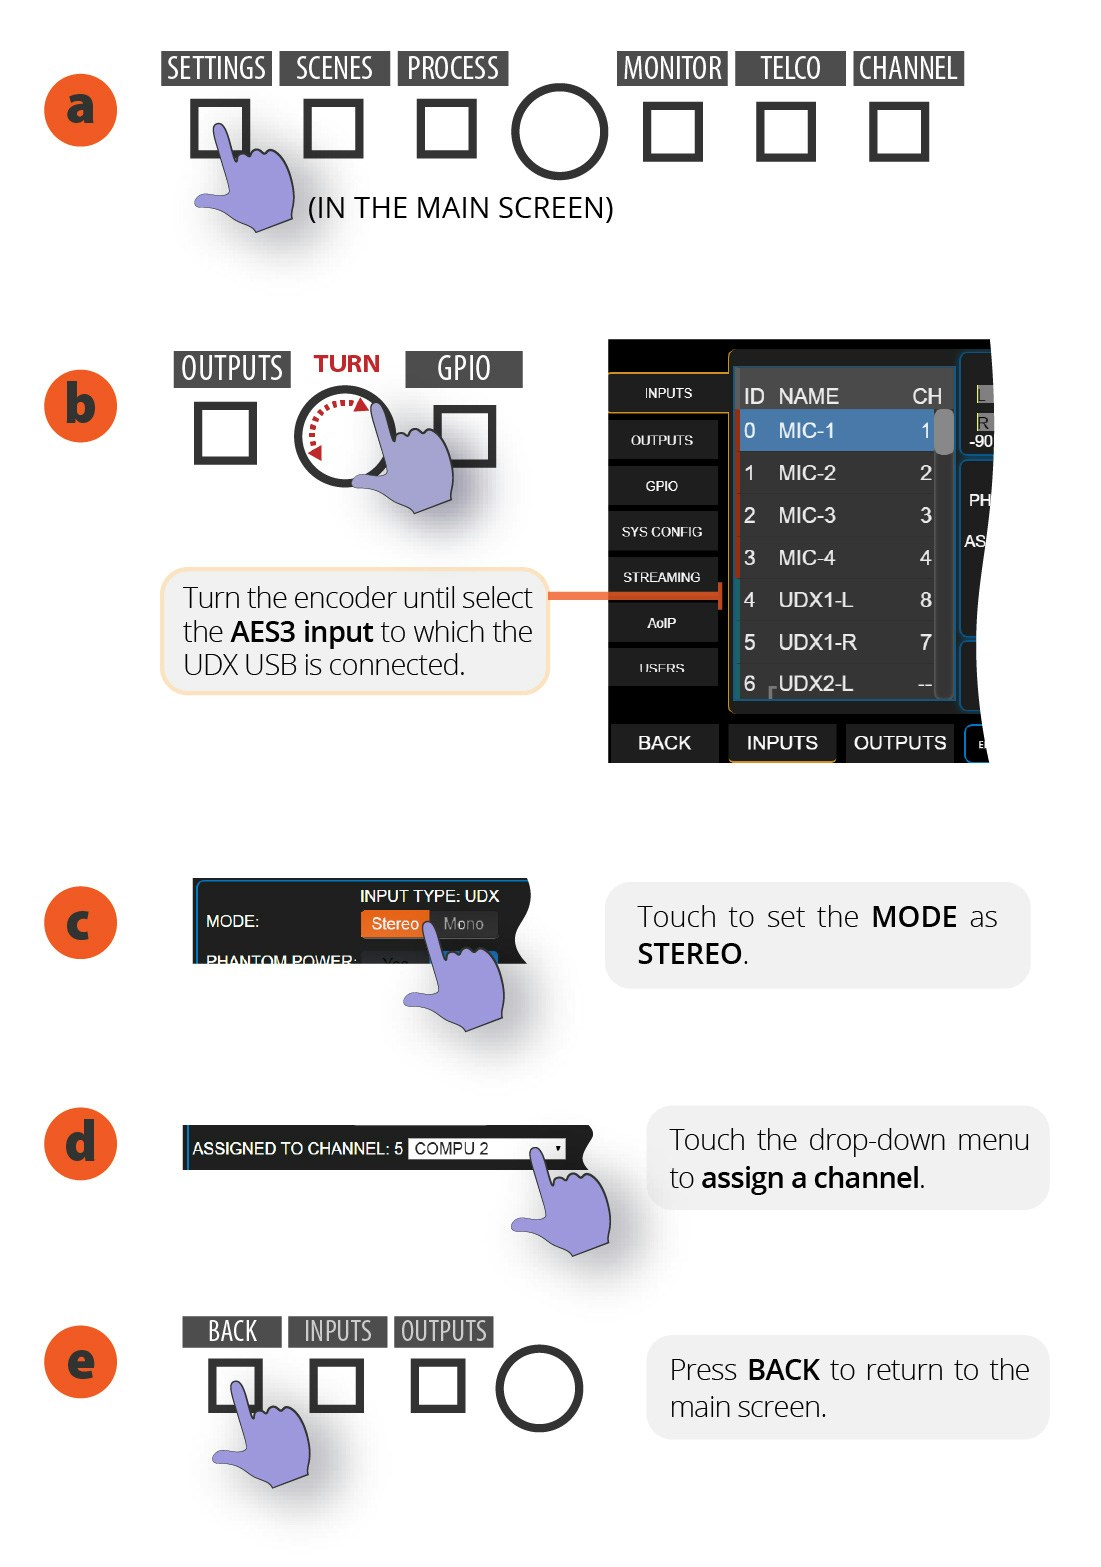
1. On the main screen, go to **SETTINGS**.
2. Turn the encoder until reaching the **AES3 input** where UDX USB was connected.
3. Set **MODE** to **STEREO**.
4. **Assign a channel** to the input. If you choose a channel that is assigned to another input, a warning will appear. If you continue, the previous assignment will be overwritten.
* AES3-1 input is not available if streaming playback service is enabled.
* On UX24 models, AES3 outputs 1 and 2 deliver PGM and REC signals respectively, while 3 and 4 are assignable. UX18 has two AES3 outputs, both assignable.
* Computer installation is automatic. Windows recognizes and enables UDX USB as a standard USB audio device for stereo playback and recording.
## AES3 Input Configuration
The layout and appearance of controls shown below may vary. This does not affect the configuration procedure.
1. On the main screen, go to **SETTINGS**.
2. Turn the encoder until reaching the **AES3 input** where UDX USB was connected.
3. Set **MODE** to **STEREO**.
4. **Assign a channel** to the input. If you choose a channel that is assigned to another input, a warning will appear. If you continue, the previous assignment will be overwritten.
 ## AES Output Configuration
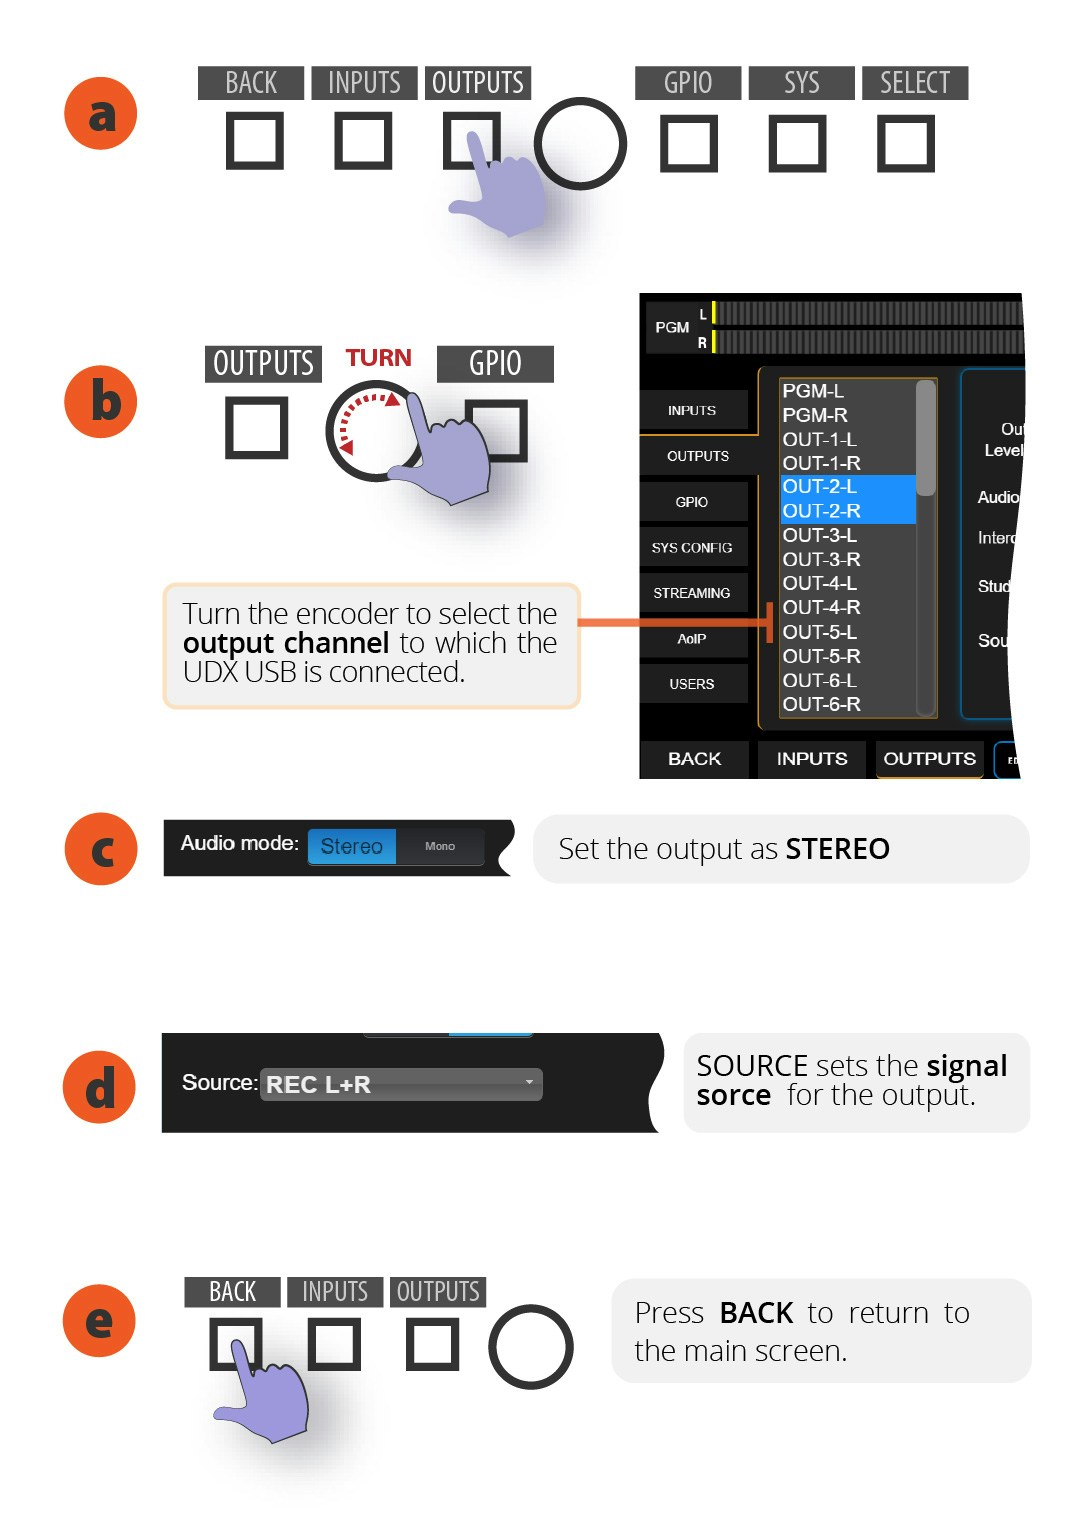
1. On **SETTINGS** screen select **OUTPUTS**.
2. Turn the encoder to **select the output** where UDX USB was connected.
3. In **AUDIO MODE** set the output to **STEREO**.
4. If the output is assignable, **SOURCE** allows choosing the signal delivered by the output.
5. Press BACK to return to main screen.
**AES3** outputs work at **48 KHz**. In Windows, **configure the recording device** to 48 KHz.
## AES Output Configuration
1. On **SETTINGS** screen select **OUTPUTS**.
2. Turn the encoder to **select the output** where UDX USB was connected.
3. In **AUDIO MODE** set the output to **STEREO**.
4. If the output is assignable, **SOURCE** allows choosing the signal delivered by the output.
5. Press BACK to return to main screen.
**AES3** outputs work at **48 KHz**. In Windows, **configure the recording device** to 48 KHz.
 ### Channel Configuration
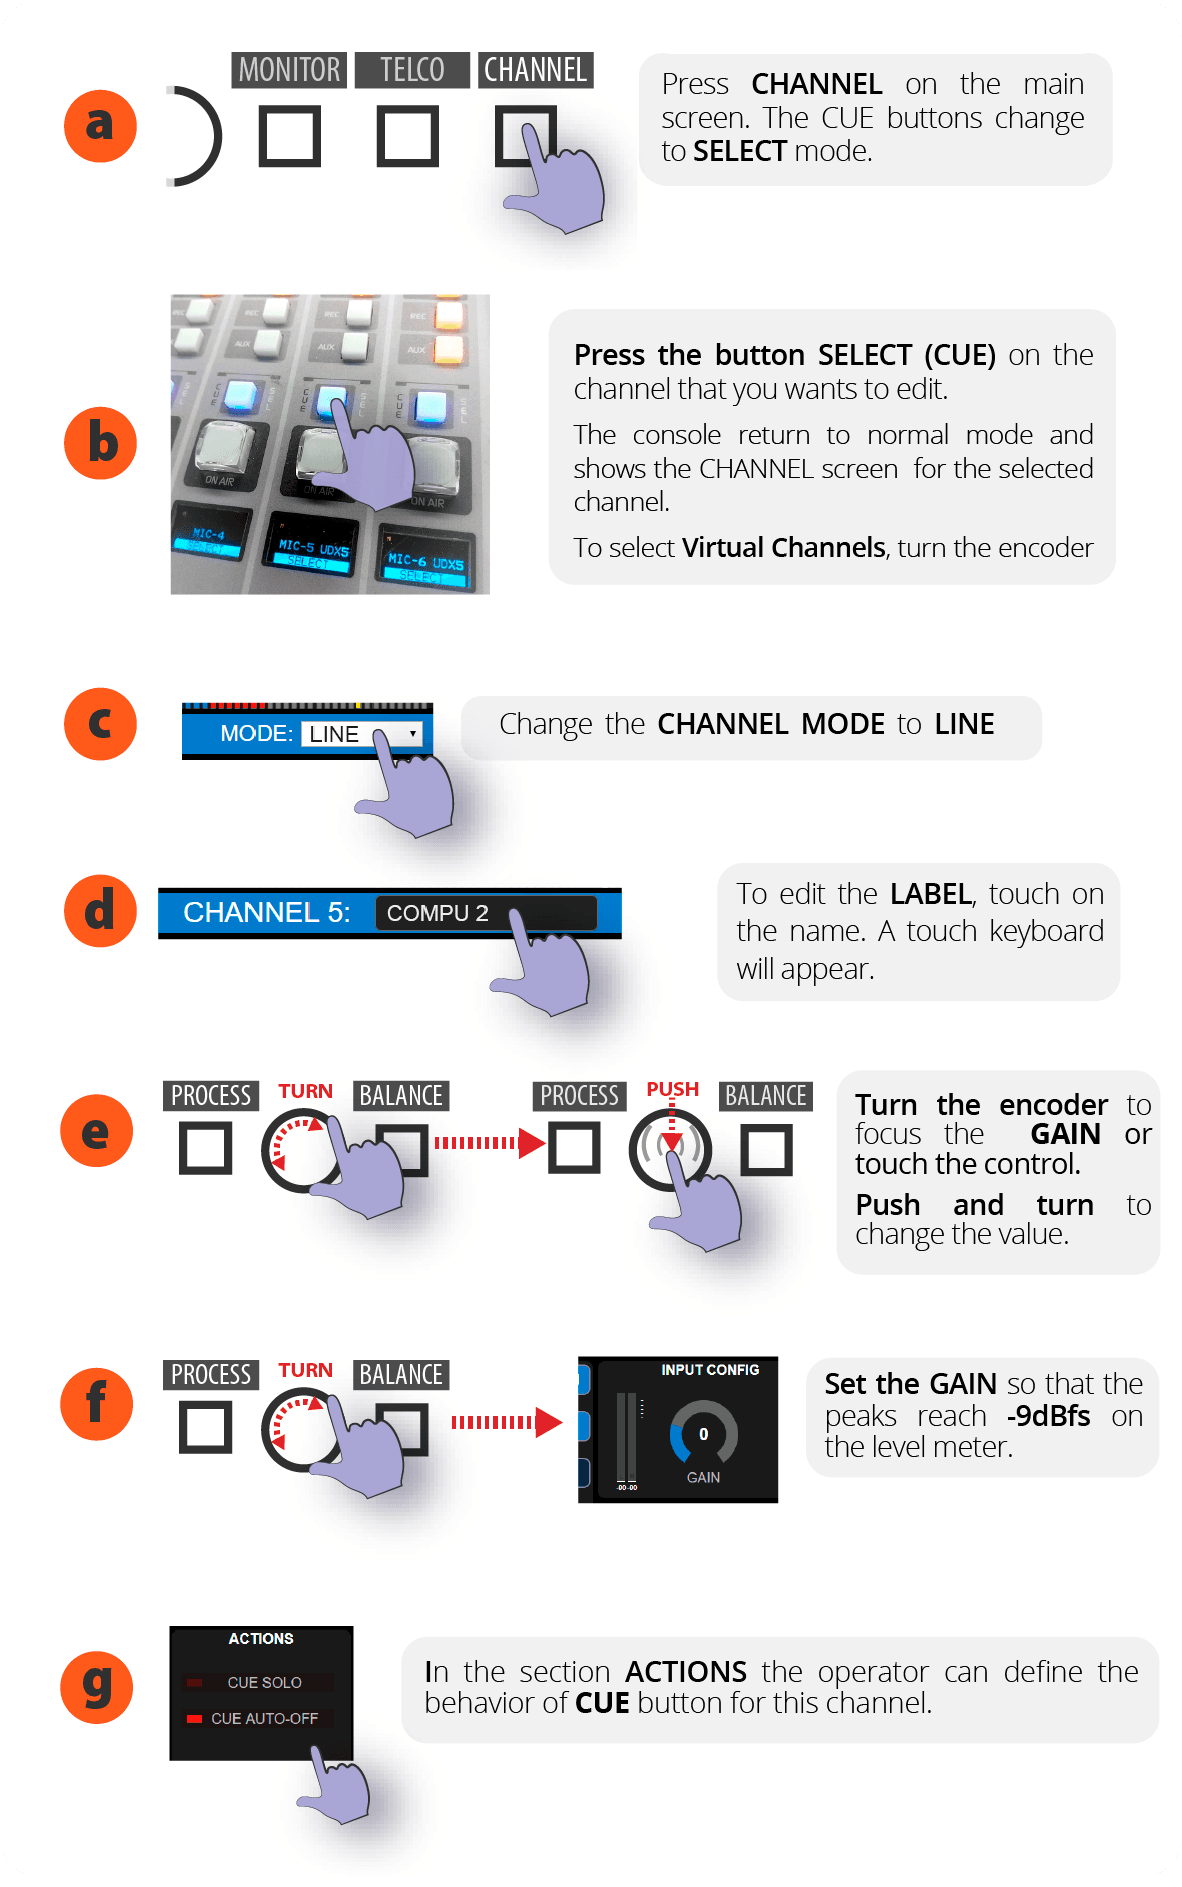
1. On main screen, press **CHANNEL**. CUE buttons change to SELECT mode.
2. Press **SELECT** button on the channel to configure. The console exits SELECT mode and the channel is selected. For virtual channels, turn the encoder and press to confirm.
3. Touch **MODE** menu on screen and choose **LINE**.
4. To **edit the label**, touch the name. A keyboard will appear to edit the text.
5. Turn encoder or touch control to choose GAIN. Press encoder to edit the value.
6. Adjust GAIN so peaks reach -9dBfs on the level meter.
### Channel Configuration
1. On main screen, press **CHANNEL**. CUE buttons change to SELECT mode.
2. Press **SELECT** button on the channel to configure. The console exits SELECT mode and the channel is selected. For virtual channels, turn the encoder and press to confirm.
3. Touch **MODE** menu on screen and choose **LINE**.
4. To **edit the label**, touch the name. A keyboard will appear to edit the text.
5. Turn encoder or touch control to choose GAIN. Press encoder to edit the value.
6. Adjust GAIN so peaks reach -9dBfs on the level meter.