> ## Documentation Index
> Fetch the complete documentation index at: https://docs.solidyne.ar/llms.txt
> Use this file to discover all available pages before exploring further.
# Device Configuration
> System configuration from the device front panel.
## The SETUP Screen
The **SETUP** screen is one of the four main screens.\
It is accessed by rotating the **encoder** and allows configuring all network and streaming options.
* The initial view shows the status of **Wi-Fi, Ethernet and Modem**.
* For each connection it indicates if there is an **assigned IP** or if it is **inactive**.
* For Wi-Fi, it also shows the **network name** of the connected network.
Pressing the encoder displays all configuration options.
***
### SETUP → Wi-Fi
* Lists available **2.4G and 5.8G** wireless networks, sorted by signal strength.
* Signal level is expressed in **dB millivolts** (values closer to 0 = stronger signal).
* The **Wi-Fi interface MAC** appears in the upper right corner.
Some providers require reporting the interface **MAC** to authorize the connection.
***
### SETUP → Ethernet
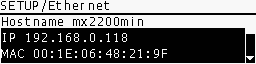 * Configures wired network parameters.
* Factory default is **DHCP enabled**, so it receives an IP automatically.
* For **static IP**, DHCP must be disabled and manually assign:
* IP Address
* Subnet Mask
* Gateway
* DNS Servers
* Shows the **MAC** address for reference (not editable).
Manual configuration should be performed by **specialized technical personnel**.
***
### SETUP → Modem
* Configures wired network parameters.
* Factory default is **DHCP enabled**, so it receives an IP automatically.
* For **static IP**, DHCP must be disabled and manually assign:
* IP Address
* Subnet Mask
* Gateway
* DNS Servers
* Shows the **MAC** address for reference (not editable).
Manual configuration should be performed by **specialized technical personnel**.
***
### SETUP → Modem
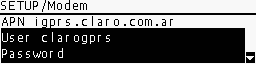 * Compatible with **4G dongles** (plug & play).
* Modern dongles act as Ethernet adapters and require no configuration.
* Older 3G dongles need **APN, username and password** parameters (provided by ISP).
* If connection is active, it shows an **IP different from 0.0.0.0**.
Always connect the modem using a **USB extension cable**.\
Direct connection to the USB port may cause **audible interference**.
***
### SETUP → RTP Stream
* Compatible with **4G dongles** (plug & play).
* Modern dongles act as Ethernet adapters and require no configuration.
* Older 3G dongles need **APN, username and password** parameters (provided by ISP).
* If connection is active, it shows an **IP different from 0.0.0.0**.
Always connect the modem using a **USB extension cable**.\
Direct connection to the USB port may cause **audible interference**.
***
### SETUP → RTP Stream
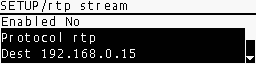 * RTP transmission configuration:
* Destination IP address
* Port
* Codec (MP3, Opus, PCM)
These advanced settings should be configured by **specialized technical personnel**.
***
### SETUP → HTTP Stream
* RTP transmission configuration:
* Destination IP address
* Port
* Codec (MP3, Opus, PCM)
These advanced settings should be configured by **specialized technical personnel**.
***
### SETUP → HTTP Stream
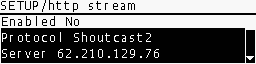 * Configuration for streaming to **Icecast/Shoutcast** web servers.
* Credentials and parameters from the contracted server are entered.
***
### SETUP → SIP Account
* Configuration for streaming to **Icecast/Shoutcast** web servers.
* Credentials and parameters from the contracted server are entered.
***
### SETUP → SIP Account
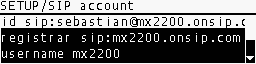 * Entry of **SIP account** data (provided by the service).
* At least **two accounts** are required:
* A SIP address for the console. Ex: `mx2200@sip.linphone.org`.
* A SIP address for the studio, to be configured in the VoIP software used to receive (or make) calls. Ex: `studio@sip.linphone.org`.
SIP services can be free (e.g.: [Linphone](https://www.linphone.org)) or paid, depending on implementation complexity.
### SIP Audio Quality
SIP account QUALITY allows setting the preferred audio quality for SIP calls.\
Available options:
* Mono VoIP 16 kbps
* Mono Wideband 32 kbps
* Mono FM 64 kbps
* Mono HiStudio 128 kbps
* Stereo Mid 128 kbps
* Stereo HiStudio 256 kbps
MX2200 prioritizes the **Opus** codec at the selected quality.\
If the receiver doesn't support it, another available codec will be automatically negotiated.
***
### SETUP → SIP Contacts
* Entry of **SIP account** data (provided by the service).
* At least **two accounts** are required:
* A SIP address for the console. Ex: `mx2200@sip.linphone.org`.
* A SIP address for the studio, to be configured in the VoIP software used to receive (or make) calls. Ex: `studio@sip.linphone.org`.
SIP services can be free (e.g.: [Linphone](https://www.linphone.org)) or paid, depending on implementation complexity.
### SIP Audio Quality
SIP account QUALITY allows setting the preferred audio quality for SIP calls.\
Available options:
* Mono VoIP 16 kbps
* Mono Wideband 32 kbps
* Mono FM 64 kbps
* Mono HiStudio 128 kbps
* Stereo Mid 128 kbps
* Stereo HiStudio 256 kbps
MX2200 prioritizes the **Opus** codec at the selected quality.\
If the receiver doesn't support it, another available codec will be automatically negotiated.
***
### SETUP → SIP Contacts
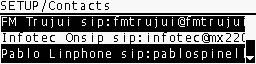 * Shows the SIP contacts directory.
* Basic navigation from console; full editing **only from web interface**.
1. [Access the web interface](/en/mx2200/mx2200-config-acceso).
2. Select the **CONTACTS** tab.
* Shows the SIP contacts directory.
* Basic navigation from console; full editing **only from web interface**.
1. [Access the web interface](/en/mx2200/mx2200-config-acceso).
2. Select the **CONTACTS** tab.
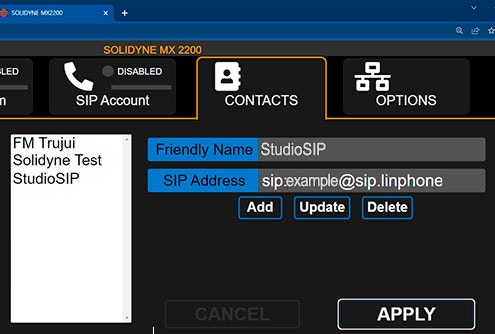 3. Enter **SIP Address** and **Friendly Name**.
4. Press **ADD** and then **APPLY** to send changes to hardware.
#### Edit contact
1. Select the contact from the list.
2. Modify the fields.
3. Press **UPDATE** and then **APPLY**.
#### Delete contact
1. Select the contact.
2. Press **DELETE** and then **APPLY**.
***
### SETUP → Power Info
3. Enter **SIP Address** and **Friendly Name**.
4. Press **ADD** and then **APPLY** to send changes to hardware.
#### Edit contact
1. Select the contact from the list.
2. Modify the fields.
3. Press **UPDATE** and then **APPLY**.
#### Delete contact
1. Select the contact.
2. Press **DELETE** and then **APPLY**.
***
### SETUP → Power Info
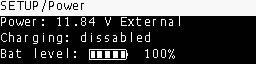 * Shows power and battery status.
* Indicates if the unit is using internal battery or external power.
* Example: `Battery 7.0 V` → console running on battery.
* The `Bat level` field shows remaining level (%).
* A 100% charge typically provides over 3 hours of transmission.
* The unit automatically shuts down at **6.2 V**.
* A **12V power bank** can be used as external power source.
***
### SETUP → Time Zone
* Adjusts the time zone to correctly timestamp recordings.
* Usually configured once.
* Synchronization is done through **public NTP servers**.
***
### SETUP → RX Volume
* Adjusts the return level sent from the station when connection is via **SIP**.
* This return is added to:
* CUE monitoring circuit (headphones).
* Send to **POTS** lines.
* Send to **Bluetooth** line.
* Shows power and battery status.
* Indicates if the unit is using internal battery or external power.
* Example: `Battery 7.0 V` → console running on battery.
* The `Bat level` field shows remaining level (%).
* A 100% charge typically provides over 3 hours of transmission.
* The unit automatically shuts down at **6.2 V**.
* A **12V power bank** can be used as external power source.
***
### SETUP → Time Zone
* Adjusts the time zone to correctly timestamp recordings.
* Usually configured once.
* Synchronization is done through **public NTP servers**.
***
### SETUP → RX Volume
* Adjusts the return level sent from the station when connection is via **SIP**.
* This return is added to:
* CUE monitoring circuit (headphones).
* Send to **POTS** lines.
* Send to **Bluetooth** line.